Building a gaming PC can feel overwhelming at first, especially when you’re unsure what components you need or how the whole system fits together. But the truth is, assembling your own machine is much easier than it looks. In this guide, we’ll break down what components you need to build a PC and show you how to build your own gaming PC step by step with total confidence. Let’s go!
Why Should You Build Your Own PC?
Building your own PC is one of the most rewarding projects you can take on as a computer user. Not only do you get full control over how your machine performs, but you also save money and gain the kind of hands-on technical knowledge that makes you a more confident PC owner. Let’s see why more people are choosing to build their own computers:
Complete Customization and Personalized Performance
One of the biggest advantages of building your own PC is the ability to fully customize it. Every part of the system, from the processor to the lighting, can be chosen to match your personal needs, performance goals, and budget. Gamers can focus on a powerful GPU for better frame rates, while creators or professionals may prioritize fast storage and additional memory. Unlike many prebuilt systems that hide lower-quality parts behind flashy marketing, a custom build lets you choose components you trust and ensures you’re paying only for what you want.
Cost-Effectiveness and Better Value
There’s also a common myth that building a PC is more expensive, but in reality, you often get better performance for the same price compared to a prebuilt machine. You can shop around for deals, mix and match brands, and choose your own memory or storage instead of being stuck with overpriced or underperforming pre-installed parts. Over time, this flexibility saves money and lets you upgrade at your own pace.
Upgradability and Future-Proofing
As your needs change or new technology comes out, you can swap in a new graphics card, add more RAM, or even replace the processor without rebuilding the entire system. Choosing a good motherboard and power supply from the start gives you plenty of room to grow, making your PC a long-term investment rather than a disposable device.
Learning Experience and Personal Satisfaction
Finally, building your own PC teaches you a lot about how computers work. You gain a clearer understanding of what each part does, how they connect, and how to troubleshoot issues on your own. And nothing quite matches the satisfaction of pressing the power button on a machine you assembled yourself and watching it come to life. It’s a practical skill, a fun project, and a rewarding experience all in one.
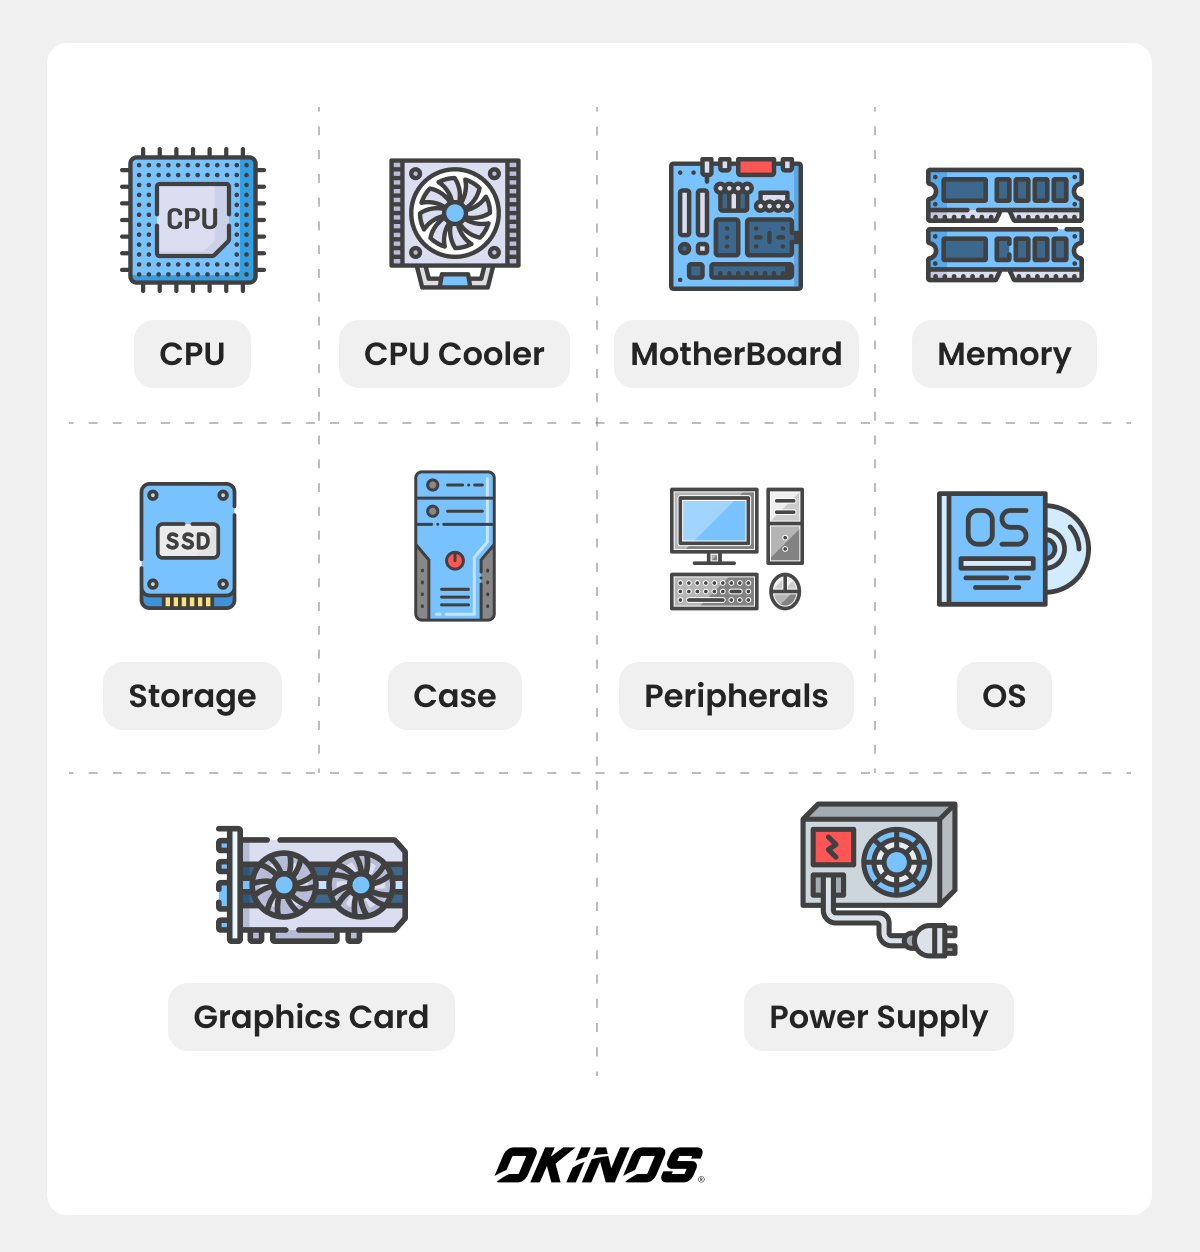
What Parts Do You Need to Build a PC: Complete List
CPU
The Central Processing Unit, or CPU, is often considered the brain of your computer because it handles the instructions, calculations, and processing that make every task possible. A faster CPU helps your system think and react more quickly, which affects everything from gaming performance to video editing and everyday multitasking. One of the biggest factors to look at is the CPU’s clock speed, measured in gigahertz (GHz). Most modern processors sit between 1 and 3.8 GHz, and higher speeds generally translate to better responsiveness. For gaming, the CPU plays a major role in helping your system maintain high frame rates. Two specifications matter most: Max Turbo Frequency, which boosts single-threaded performance and directly affects FPS, and core/thread count, which keeps your system smooth when juggling multiple tasks at once. Most gamers will be perfectly served by a 6-core or 8-core CPU. AMD and Intel are the two major manufacturers, and some of the most popular gaming CPUs now include the Intel Core i5-14600K for mid-range builds, the AMD Ryzen 7 7800X3D for high-end gaming, and the Intel Core i9-14900K for top-tier enthusiasts. Before buying a processor, compatibility should be your first concern. Every CPU is designed for a specific socket type, so it must match the motherboard you plan to use. Performance also ties into thermals; faster CPUs generate more heat, meaning they need proper cooling to run safely. In terms of pricing, CPUs range widely, but you can find capable processors for around 150 dollars, with strong all-rounders and gaming options typically falling under 300 dollars. Only the highest-end enthusiast models go beyond that range. Typical CPU Specs to Compare
- Clock Speed (GHz): Higher = faster processing
- Max Turbo Frequency: Affects FPS significantly
- Cores / Threads: More = better multitasking
- Socket Type: Must match your motherboard
- TDP (Heat Output): Higher TDP = stronger cooling needed
Cooling System
The CPU cooling system is a critical part of every PC build because the processor does not have its own internal cooling. As the CPU works, it generates a significant amount of heat, and if that heat is not controlled, the system can slow down, throttle performance, or even damage sensitive components like the motherboard. A proper cooling solution keeps temperatures stable, protects hardware, and prevents issues such as thermal throttling, where the CPU automatically lowers its speed to avoid overheating. Every build needs a cooler, whether you choose a traditional air cooler or a liquid-based system. There are two main types of cooling systems: air and liquid. In short, air coolers are popular and beginner-friendly. They push air through a metal heatsink to pull heat from the CPU. They cost less, last longer, and install easily, so many choose them for budget or first PC builds. Liquid coolers, or AIOs pump coolant through tubes to absorb CPU heat and move it to a radiator for fans to release. They run quieter and cool better under heavy loads or overclocking, but cost more and take more effort to install. Thermal paste is another essential part of the cooling process, as it fills microscopic gaps between the CPU and the cooler’s base. If your cooler doesn’t come with pre-applied paste, you’ll need to apply a small dot about the size of a grain of rice or a pea at the center of the CPU. The pressure from securing the cooler spreads the paste evenly, ensuring efficient heat transfer.
Motherboard
The motherboard is the main circuit board of your PC and acts as the central hub that links every component together. Choosing the right motherboard is one of the most important decisions in a PC build because it determines what other hardware you can use and what upgrades you can make in the future. In many ways, it’s the backbone of your computer and sets the foundation for how powerful, flexible, and long-lasting your build can be. Compatibility is the first thing to consider when looking at motherboards. Each board supports only certain types of CPUs based on the socket type, so it must match the processor you plan to buy. The motherboard also dictates which memory technology your system can use. Much of this is determined by the board’s chipset, which controls its capabilities and helps determine whether it supports cutting-edge features like PCIe 5.0 slots or next-generation RAM. A good motherboard provides room to grow. If you want an upgrade-friendly system, choosing a board with extra memory slots, additional storage connectors, or multiple PCIe slots can save money over time by making future upgrades easier. Motherboards may vary in the number of expansion ports, USB options, networking features, and quality-of-life additions like built-in Wi-Fi or improved audio. Some higher-end boards even include advanced voltage regulation components to deliver stable power to the CPU and GPU, which is especially helpful during heavy workloads or light overclocking. Motherboards have different form factors, which define their sizes. Your PC case should support the motherboard size you choose. Smaller boards like Micro‑ATX include fewer expansion slots. Larger boards like ATX give more upgrade options and layout freedom. A mid-size option, Mini‑ATX, balances space and flexibility. Review our detailed guide to compare ATX, Mini-ATX, and Micro-ATX so you can pick the best fit for your needs.
GPU
The Graphics Processing Unit, or GPU, is one of the most important components in a gaming PC because it handles everything you see on the screen, from simple images to complex 3D worlds. While the CPU acts as the brain of your system, the GPU is the powerhouse that renders graphics at high speeds and determines how smoothly your games run. A strong GPU allows you to play modern titles at high resolutions and enjoy richer details, sharper lighting effects, and higher frame rates. For anyone who cares about gaming performance, video editing, or visually demanding tasks, this component plays a central role, and a dedicated one is always a must. When choosing one, several performance metrics matter. VRAM capacity affects how well the GPU handles high-resolution textures, while clock speeds influence how quickly it processes frames. Newer GPUs also support features like ray tracing, a technology that simulates real-world lighting for more cinematic visuals. Some models, such as the latest Intel Arc cards, also support advanced upscaling technologies like XeSS, which boosts performance by rendering at a lower resolution and intelligently upscaling to produce crisp, high-quality images. Key GPU Specs to Compare
- VRAM (Video Memory): More VRAM handles higher-resolution textures
- Clock Speeds: Affect how fast frames are processed
- Ray Tracing: Provides realistic lighting and shadows
- Upscaling Tech: DLSS, FSR, or XeSS for boosting performance
- Power Requirements: PSU wattage and PCIe connectors needed
Because the GPU influences gaming performance more than any other part, it typically receives the biggest share of a PC builder’s budget. Most modern games run well on GPUs in the 150 to 450 dollar range, while top-end GPUs can exceed four figures. Benchmark tests are your best friend when comparing different models. It’s always smart to check how a GPU performs in the games you plan to play.
RAM
Random Access Memory, or RAM, acts as your computer’s short-term memory. It stores the information your CPU needs to access quickly, such as open apps, browser tabs, and in-game data. Because RAM is much faster than your storage drive, having enough of it is one of the simplest and most affordable ways to boost overall system performance. In gaming, sufficient RAM helps keep frame rates smooth and prevents stuttering, especially in open-world or heavily modded games. It also supports multitasking, making it easier to run multiple applications, like browsers, chat apps, and game launchers, without slowdowns. When choosing RAM, the first thing to consider is capacity. For modern gaming, 16GB has become the recommended minimum, while 8GB still works for basic tasks and older games. Heavy multitaskers, creators, and future-proofed builds benefit from 32GB or more. It’s important to match your RAM capacity to what your system can actually support; buying fast or high-capacity RAM won’t help if your motherboard or CPU can’t take advantage of it. Compatibility also matters. RAM must match the memory technology supported by your motherboard, such as DDR4 or DDR5, and the correct physical size, with desktops using UDIMMs and laptops using smaller SODIMMs. Newer motherboards, including those with Intel’s 800-series chipsets, support cutting-edge DDR5 RAM, which offers higher speeds and improved efficiency. Speed and latency influence performance, too. Faster RAM enables quicker data transfers between the CPU and memory, reducing load times and improving responsiveness. You’ll often see speed ratings like DDR4-3200 or DDR5-5600, which tell you how quickly the RAM can operate. Lower latency values help with efficient data retrieval, though for most users, capacity and speed matter more than fine-tuning latency numbers. Recommended RAM Capacity
- 8GB: Basic tasks, entry-level systems
- 16GB: Minimum for modern gaming
- 32GB+: Heavy multitasking, creation, and future-proofing
RAM pricing varies depending on speed and capacity, and it often accounts for a noticeable portion of a build’s total cost. Buying RAM separately is usually more cost-effective than relying on memory preinstalled in prebuilt systems, which is often lower quality or insufficient in capacity.
Storage (SSD, HDD)
Storage is where your computer keeps everything long-term, like your operating system, programs, files, and game installations. Because modern games are massive and often require hundreds of gigabytes each, having fast and spacious storage is essential for a smooth experience. This part of your build is sometimes called secondary memory, and while it doesn’t affect frame rates directly, it has a big impact on how quickly your PC boots, how fast games load, and how responsive your system feels overall. Solid State Drives (SSDs) and Hard Disk Drives (HDDs) are the two main types of storage you can find. SSDs have largely replaced HDDs as the go-to choice because they’re much faster, often around six times faster on average, and more reliable. They have no moving parts, which means they’re silent, more durable, and better at handling daily wear and tear. SSDs have three main types. NVMe SSD is the fastest, plugs into the M.2 slot, and gives quick boot and load speeds for gaming. SATA SSD is slower but still much faster than HDD, and it works well for budgets. An external SSD stays outside the PC and helps with backups or file transfer. HDDs still offer more storage space for less money, making them a budget-friendly option for holding large files, backups, or big game libraries. Most builders combine the strengths of both by using a fast SSD for their operating system and frequently playing games and a larger HDD for bulk storage.
| Feature | SSD | HDD |
| Speed | Extremely fast | Much slower |
| Reliability | Higher (no moving parts) | Lower (mechanical) |
| Noise | Silent | Audible spinning |
| Cost per GB | Higher | Lower |
| Best Use | OS, games, apps | Mass storage, backups |
A typical setup for most PC builders is to install a smaller, faster SSD, such as a 500GB or 1TB NVMe drive, as the primary drive for the OS and essential applications, and then add a larger HDD or secondary SSD for storing games, media, or other large files. For most gaming builds today, aiming for at least 1TB of total storage is ideal. Although SSD prices increase as capacity rises, buying drives separately is usually cheaper and more flexible than relying on limited preinstalled storage in prebuilt systems.
Power Supply Unit
The Power Supply Unit, or PSU, is one of the most important components in your PC because it delivers power to every other part of the system. It takes the alternating current (AC) from your wall outlet, converts it into direct current (DC), and distributes it safely and steadily to all connected parts. A high-quality PSU is essential for keeping your computer stable, preventing crashes, and protecting your expensive hardware from electrical damage. When choosing a PSU, wattage is the first factor to consider. You need enough capacity to power all your components without running the unit at its limit. Most gaming PCs fall into the 500 to 750-watt range, while performance-focused builds with power-hungry GPUs may need 650 to 850 watts or more. It’s always better to have extra headroom rather than just meeting the minimum requirement; too little power can cause overheating, crashes, and performance bottlenecks. Efficiency is another important aspect. The 80 PLUS rating tells you how effectively the PSU converts AC power into usable DC power. A Gold-rated PSU or higher is recommended for gaming PCs, offering around 90 percent efficiency across different load levels. Quality also matters. A PSU from a reputable brand helps protect your build from power surges or unexpected shutdowns, and investing in reliable power delivery is far more important than saving a few dollars on a cheaper unit that could fail and damage other components. Modularity is an additional feature to consider. Fully modular PSUs let you connect only the cables you need, which keeps the interior of your PC cleaner and makes cable management much easier. Non-modular and semi-modular PSUs often cost slightly less, but the flexibility and tidiness of a fully modular design are worth it for most builders. As for size, the standard ATX form factor fits most gaming cases and is the safest option unless you’re building in a compact small-form-factor case that requires a specialized power supply. Modular vs Non-Modular PSU
| Type | Pros | Cons |
| Fully Modular | Best cable management, cleaner builds, easier installation | Slightly more expensive |
| Semi-Modular | Some removable cables, good balance | Still includes some fixed cables |
| Non-Modular | Cheaper, sometimes slightly more efficient | Harder to manage cables |
PC Case
The PC case, or chassis, is the protective shell that holds all the components of your custom-built computer. It keeps everything organized, shields delicate parts from dust and damage, and provides the physical structure that ties your build together. Although it may seem like a simple enclosure, the case plays a major role in airflow, cooling, and ease of installation. All of which affect your computer’s long-term performance. Cooling is one of the most important considerations when choosing a case. A good case supports proper airflow, helping cool air flow in and hot air exit the system. Larger cases usually provide better airflow and more flexibility for fans and radiators, making them ideal for high-performance builds or gaming rigs with powerful GPUs. Many cases come with pre-installed fans, but you may still need additional intake and exhaust fans to maintain good temperatures. When comparing cases, look for models with plenty of fan mounts, mesh panels, or other airflow-focused designs. Size and compatibility are essential as well. Your case must fit your motherboard, graphics card, power supply, and cooling system comfortably.
- Mid-tower cases are the most popular choice, as they support ATX motherboards, offer plenty of space for large graphics cards, and are easy to build in.
- Full-tower cases are even larger and can accommodate any motherboard size, including Extended ATX, making them ideal for expansion-heavy builds.
- Smaller formats like Mini-ITX cases are great for compact setups, but can run hotter and require more careful planning due to tighter space.
If you’re using a high-end GPU or larger cooling system, choosing a spacious case will make installation easier and airflow better. Aesthetics are purely persona,l but still a big selling point for many builders. Cases come in many styles; some with tempered glass panels to show off RGB lighting and custom components, others designed with minimalism and airflow in mind. Cable management features are just as important. Good cases include compartments, cutouts, and tie-down points that help you route cables neatly behind the motherboard tray. This not only improves the look of your system but also boosts airflow by preventing cables from blocking fans. Functionally, the case houses storage drive bays for 2.5-inch SSDs and 3.5-inch HDDs, provides front I/O ports such as USB and USB-C, and includes a space for the I/O shield if your motherboard requires one.
Operating System (OS)
The operating system is the essential software that allows your computer to function. It acts as a bridge between your hardware and your applications, handling everything from how your desktop looks to how your files are organized and how programs communicate with the CPU, RAM, and storage. Without an OS, even the most powerful PC won’t do anything. There are several operating systems to choose from, and each one has its own style, strengths, and limitations. Windows 10 and Windows 11 remain the most popular choices for gaming because of their broad compatibility with games, drivers, and hardware. Linux is also a strong option for programmers, enthusiasts, and gamers who prefer open-source software or want more customization, though it requires more technical know-how. macOS is exclusive to Apple computers and isn’t available for custom PC builds, while ChromeOS focuses on web-based tasks and is not commonly used in gaming or full desktop setups. If you don’t have a strong preference, choosing the OS that aligns with the software you plan to run, especially games or creative tools, is the best approach.
Peripherals (Keyboard, Mouse, Monitor)
Peripherals are the external accessories you use to interact with your new PC, and while they aren’t part of the internal build, they are essential for completing your setup and shaping your overall experience. The monitor is your window into the digital world, and choosing the right one can make games look sharper, smoother, and more immersive. A basic 1080p monitor is fine for casual gaming, but higher resolutions like 1440p or 4K offer richer detail. Performance matters, too. A high refresh rate and low response time make motion feel fluid, while GPU-sync technologies like Nvidia G-Sync or AMD FreeSync help eliminate visual tearing. Larger screens, different aspect ratios, and extra connectivity ports can also improve productivity and gameplay. The keyboard and mouse are equally personal choices. Keyboards come in membrane or mechanical styles, with mechanical models providing a crisp, tactile feel that many gamers prefer. Wireless or wired options, macro keys, and RGB lighting all come down to your preferences and how you use your PC. Your mouse should feel natural in your hand, with smooth movement and responsive clicks, especially if you play fast-paced games that demand precision. Other peripherals, such as headsets or speakers, round out your setup. Good audio enhances immersion, whether you’re exploring open-world games or watching movies. Choosing comfortable, ergonomic peripherals ensures that you can enjoy long sessions without discomfort while giving your gaming PC setup a polished, complete feel.
Everything You Need to Build a PC: Full Checklist
| Category | Item | Checklist |
| Core Components | CPU (Processor) | ☐ |
| Motherboard | ☐ | |
| GPU (Graphics Card) | ☐ | |
| RAM (Memory) | ☐ | |
| Storage (SSD / HDD) | ☐ | |
| Cooling & Airflow | CPU Cooler (Air or Liquid) | ☐ |
| Case Fans | ☐ | |
| Airflow parts (Intake vs Exhaust) | ☐ | |
| Thermal Paste (or pre-applied on cooler) | ☐ | |
| Power & Enclosure | Power Supply (PSU) | ☐ |
| PC Case | ☐ | |
| Software | Operating System (OS) | ☐ |
| Peripherals | Keyboard | ☐ |
| Mouse | ☐ | |
| Monitor | ☐ | |
| Speakers/Headset | ☐ |
How to Build Your Own PC from Scratch: Complete Guide
So you might ask: Is building a PC hard? Not at all. Modern parts are beginner-friendly. Connectors and mounts use clear shapes, and most components fit only one way. Here we will walk you through the PC-building step by step so you can assemble your system with confidence. Stay patient and methodical during the installation, and remember the golden rule: don’t force anything. Components are meant to fit into place naturally, and forcing a part, especially the CPU, can cause permanent damage.
Prepare the Tools and Workspace
Building a PC is much easier when your workspace is clean and organized. Set up on a large, flat, well-lit surface, like a desk or table, with enough room to lay the case on its side and spread out components. A towel or soft pad under the case can prevent scratches, and small containers or even the motherboard box work well for holding screws. Keep drinks and liquids far away from your build area. For tools, a #2 Phillips screwdriver is essential, and a magnetic one helps prevent dropped screws. If you’re installing an M.2 SSD, a smaller #0 Phillips screwdriver will also be useful. Have your USB flash drive (8GB or larger) ready with your OS installer, and gather thermal paste (if your cooler doesn’t have it pre-applied), cable ties or Velcro straps, and any adapters or extra cables. Keep all manuals nearby, especially the motherboard manual, since it will answer 90% of your “where does this go?” questions. Never use power tools; it’s far too easy to overtighten and damage parts.
Tips: Take Basic Safety Measures
PC components are fairly robust, but electrostatic discharge (ESD) can silently kill them, so a little care goes a long way. Ideally, work on a hard floor instead of carpet, and avoid wearing socks if you must build on carpet. An anti-static wrist strap clipped to the case or a grounded object helps discharge static from your body before you touch any components. Always hold parts like the CPU, RAM, and GPU by their edges, and avoid touching gold contacts or pins. Keep the power supply unplugged from the wall while you’re assembling everything. If a component doesn’t want to go in, stop and recheck its orientation.
Install the CPU onto the Motherboard
Start with the motherboard out of the case, placed on its box or your work surface. Find the CPU socket, which will usually be covered with a protective plastic cap. Release the retention arm by pressing it down and out, then lifting it to open the socket tray. Take the CPU out of its packaging, holding it only by the edges, and locate the small alignment marker (usually a triangle) on one corner. Match this with the triangle or marker on the socket. Gently lower the CPU into the socket; it should drop into place without you pushing it. Once it’s sitting flat, lower the retention arm back down and lock it into place. You may feel some resistance in the lever, but you should never press directly on the CPU itself.
Install RAM
With the CPU installed, move on to RAM, which is one of the easiest parts to install. Identify the memory slots on the motherboard. If you have two RAM sticks and four slots, check the manual to see which slots to use for dual-channel mode, often labelled A2 and B2. Open the plastic clips at the ends of the chosen slots. Hold each RAM stick by the sides to avoid touching the gold pins and line up the notch in the bottom edge of the module with the ridge in the slot. Once aligned, press down firmly on both ends of the RAM until the clips snap up and lock into place. It often takes more pressure than beginners expect, but you should feel and hear a distinct click when it’s seated properly.
Install Storage
Installing storage is simpler when you know the shapes. An M.2 NVMe SSD looks like a slim gumstick. It slides into the M.2 slot and locks with one small screw. It is easier to mount before the board sits inside the case, since the slot is open and easy to reach. For bay-mounted drives, 2.5‑inch SATA SSDs and 3.5‑inch HDDs rest inside drive trays or brackets. You fix them with screws, then slide the tray back into the drive cage. Many modern cases also use tool-free trays or brackets. After mounting, connect the data side to the board with a SATA data cable. Next, plug the power from the PSU SATA power lead. To mount an M.2 NVMe SSD, find the slot and standoff screw. Remove the screw and keep it safe. Slide the module in at a light angle until it seats. Let it rest upward, then press it flat on the standoff. Replace the screw until it feels snug. Do not twist it too tight.
Attach CPU Cooler System
Next, install the CPU cooler to keep your processor from overheating. Check the cooler’s manual to see whether you need to swap or add a mounting bracket on the back of the motherboard. You may need to remove or replace the preinstalled bracket before attaching the cooler. Make sure to remove the protective film from the contact surface between the CPU and the cooler before installation. If your cooler does not have thermal paste pre-applied, add a small pea-sized dot of paste to the center of the CPU. Place the cooler onto the CPU, aligning it with the mounting hardware, and apply gentle, even pressure as you secure it with screws or clips according to the instructions. The goal is to spread the thermal paste into a thin, even layer without squeezing it out over the edges. Once mounted, plug the cooler’s fan or pump cable into the CPU_FAN header on the motherboard so the system can monitor temperatures and adjust fan speed automatically.
Place the Motherboard Inside the Case
Now that the CPU, RAM, M.2 SSD, and cooler are installed, you can move the motherboard into the case. First, remove the side panels of the case and set them aside. If your motherboard uses a separate I/O shield, snap it into the rectangular opening at the back of the case, making sure it’s fully seated. Next, check that the case has standoffs installed in the correct positions to match the screw holes on your motherboard. These small raised posts keep the board from touching the metal case. Lower the motherboard into the case, aligning its rear ports with the I/O shield, and resting it on the standoffs. Once aligned, secure it gently with screws, starting with one in the center to hold it in place. Tighten the rest until they’re snug, but don’t crank them down excessively, as overtightening can crack or warp the board.
Install the Power Supply
With the motherboard in place, you can install the power supply. Most modern cases mount the PSU at the bottom rear. Slide the PSU into position with its fan facing down toward a filtered vent if one is available, or facing up into the case if there isn’t a vent. Align it with the mounting holes and secure it using the included screws. If your PSU is modular or semi-modular, now is a good time to plug in the main cables you’ll need: the 24-pin motherboard cable, the CPU power cable, PCIe cables for the GPU, and SATA power cables for storage. Route these cables roughly toward their destinations, but leave final tidying for the cable management step. Keep the PSU switch in the “Off” position until the build is complete.
Install the GPU
Now it’s time for the graphics card. Identify the primary PCIe x16 slot on your motherboard, which is the longest slot and often the topmost one. Remove the metal expansion slot covers from the back of the case where the GPU’s display ports will line up. Holding the card by the edges, align the gold fingers of the GPU with the PCIe slot and gently press down until it clicks into place and the rear bracket sits flush with the case. Secure the card to the case with one or two screws where the slot covers were. If your GPU requires external power (usually for gaming), connect the appropriate PCIe power cables from the PSU, such as 6-pin, 8-pin, or newer combined connectors. These connections are essential; without them, the card will not function correctly. Before buying a card, confirm that your PSU has enough wattage and the correct connectors to support it. Physical size also matters: many GPUs are large, and some take up two or even three expansion slots, so you’ll need a case with enough clearance.
Connect All Power and Data Cables
With all the major components installed, it’s time to connect everything together. Start by plugging the 24-pin ATX power cable into the large connector on the right side of the motherboard, then attach the 8-pin (or 4+4-pin) CPU power connector near the top of the board. This CPU power cable is easy to miss, but the PC will not boot without it. Connect SATA power cables from the PSU to any 2.5″ or 3.5″ drives you installed, and run SATA data cables from those drives to the SATA ports on the motherboard. Make sure your GPU’s PCIe power connectors are fully seated. Finally, connect the front panel connectors from the case, power button, reset button, power LED, HDD LED, front USB, and audio to the appropriate headers on the motherboard. The motherboard manual will show exactly where each tiny plug needs to go and how to orient them.
Cable Management
Good cable management improves airflow, reduces dust buildup, and makes your build look clean and professional. Route as many cables as possible behind the motherboard tray or through cutouts in the case to keep the main compartment uncluttered. Use zip ties or Velcro straps to bundle cables together and anchor them to tie-down points. Check that no cables are rubbing against fan blades or blocking airflow paths from intake to exhaust. Spending a few extra minutes here will make future upgrades and troubleshooting much easier.
Power On & Enter BIOS for Initial Checks
With everything connected and tidy, it’s time for the first power-on. Reattach the side panels, connect your monitor to the GPU (not the motherboard), and plug in your keyboard and mouse. Plug the power cable into the PSU and flip the PSU switch to “On.” Press the power button on the case. If all goes well, you should see fans spin and lights turn on. As soon as you see the initial splash screen, press the key indicated to enter the BIOS, usually Delete, F2, or a similar key. Inside the BIOS, check the system information page to confirm that your CPU, RAM, and storage drives are detected. If something is missing, power down and recheck the relevant connections. While you’re in BIOS, go to the Boot menu and set your USB flash drive with the OS installer as the first boot device, and your main SSD or HDD as the second.
Install the Operating System
Once the BIOS is configured, restart the PC and let it boot from the USB drive containing your OS installer. Follow the on-screen instructions to choose your language, accept the terms, and select the drive on which to install the operating system. The installer will create the necessary partitions and copy files. After the OS finishes installing and boots to the desktop for the first time, you’re ready for final setup. Install the latest GPU driver from the manufacturer’s website, along with your motherboard chipset and storage drivers if needed. Run system updates to bring your OS up to date.
Quick Troubleshooting for Building Your Own Computer
Troubleshooting is a normal part of building your first PC; even experienced builders run into small hiccups during the first power-on. Now, let’s look at some common issues you may encounter.
No Display / Black Screen
Sometimes the PC powers on, fans spin, and lights turn on, but the monitor stays black. This usually means the display is connected to the wrong port or a component isn’t fully seated. Make sure the monitor is plugged into the GPU’s video output and not the motherboard’s. Reseat the RAM and graphics card firmly until they click into place, and verify that the GPU has its PCIe power cables connected. If everything appears correct, look for motherboard POST codes, blinking LEDs, or beeps. These can point you toward the source of the problem.
Fans Spin, But No Boot
If your fans turn on but the system never reaches the BIOS screen, it’s often due to a memory issue or a missing power connection. Try reseating the RAM or moving it to the correct dual-channel slots recommended in the motherboard manual. Moreover, confirm that the 8-pin CPU power cable is firmly plugged in. If you can get into the BIOS, check whether all installed components are being detected.
RAM Not Detected
A PC that refuses to boot or displays memory errors may simply have RAM that isn’t properly installed. Press down on both ends of each RAM module until the locking clips snap into place; RAM requires more pressure than beginners expect. Make sure you’re using the correct slots, and confirm that the RAM type, such as DDR4 or DDR5, matches your motherboard’s supported memory standard.
Boot Device Not Found
If your PC loads straight into BIOS or shows a “No bootable device” error, it means the system can’t find your operating system. Check that your SSD or HDD is connected using both SATA data and SATA power cables. Then, in the BIOS boot settings, make sure the drive containing your OS is listed as the first boot device. Verify that your drives appear in the system information page inside BIOS as well.
Blue Screen or Random Crashes
Frequent crashes or Blue Screen of Death (BSOD) messages usually point to driver issues, overheating, or unstable memory settings. Start by updating your GPU drivers, motherboard chipset drivers, and Windows. Use monitoring software to check CPU and GPU temperatures to rule out overheating. If you installed high-speed RAM, enabling the XMP (or EXPO/DOCP) profile in BIOS can ensure it runs at its rated speed without stability issues.
Overheating or Loud Fans
If your PC gets hot quickly, makes constant loud fan noise, or shuts down under load, the cooling system may not be functioning correctly. Make sure the cooler’s fan or pump cable is connected to the CPU_FAN header on the motherboard so it can regulate speed properly. Check your thermal paste application as well, since too little or too much can cause heat issues. Also, ensure your case fans are oriented correctly for proper airflow and that loose cables aren’t blocking them. For demanding workloads or overclocking, upgrading to a liquid cooler may offer better thermal performance.
FAQs
What do I need to build pc?
To build a PC, you need core components: CPU, motherboard, RAM, GPU, storage, power supply, and a compatible case, plus a CPU cooler, thermal paste, and case fans for airflow. You’ll also need a monitor, keyboard, mouse, and an operating system.
How much does it cost to build a PC?
The cost depends on performance needs. Budget builds start around $500–$700, mid-range gaming PCs land around $900–$1,300, and high-end systems can exceed $2,000. Prices vary based on the GPU, CPU, and storage choices. Building your own PC often provides better value for the money and lets you upgrade gradually over time.
How long does it take to build a PC?
A first-time builder can expect the full process, from unpacking parts to powering on, to take about 2 to 4 hours. Adding cable management, OS installation, and driver updates may extend it to 4 to 6 hours. Experienced builders often finish much faster.
How do I maintain my PC?
Maintain your PC by cleaning dust filters and fans every few months, keeping drivers and Windows updated, and monitoring temperatures during gaming or heavy use. Ensure airflow isn’t blocked and reapply thermal paste every few years if needed. Back up important files regularly and check for unusual noises or crashes to catch problems early.
Is it better to build a PC or just get one?
Building a PC offers better customization, performance-for-price, and long-term upgradability, making it ideal for gamers and power users. It teaches you how your system works and reduces unnecessary preinstalled parts. Prebuilt PCs, however, are convenient for beginners who want a ready-to-use machine without research or assembly, though they may cost more for similar specs.
Is it hard to build your own PC?
Not really. Building a PC today is much easier than most people think. Modern components are designed to fit together like puzzle pieces, with clear connectors and detailed manuals to guide you. The hardest part is often just doing the research: making sure your parts (like the CPU, motherboard, RAM, and power supply) are compatible.
How to choose a part when building a PC?
When choosing parts for a PC build, start by reading trusted reviews to understand real-world performance, thermals, and reliability. Keep in mind that the most expensive option isn’t always the best choice for your needs. Focus on value and how the part fits your use case. Just as important, pay attention to customer support and warranty: good after-sales service, clear RMA policies, and responsive support can save you time and frustration if issues arise.
Okinos—the Best PC Case Brand You Can Rely on
Building your own PC is more than assembling parts—it’s about creating a system that reflects your needs, your style, and your ambition. Whether you’re chasing a higher gaming experience, smoother workflows, or a cleaner, more organized setup, the right components make all the difference. At Okinos, we believe every rig deserves performance, character, and long-term reliability. Our cases, fans, and accessories are engineered for airflow, durability, and builder-friendly design, giving beginners and enthusiasts a smoother building experience. Ready to take your setup to the next level? Explore our solutions and let us help bring your vision to life.
Okinos’ Amazon Rating & Customer Reviews
When building a PC, choosing the right case is essential for a smooth and enjoyable experience. Okinos’ cases on Amazon have earned high ratings and glowing reviews from our customers. Take a look at the chart below to see how our top-rated products are performing, and read some of the feedback that highlights our top-notch customer service.
| Product | Rating |
| Air Cross | ⭐⭐⭐⭐🌟 4.7 / 5 · 43 Reviews |
| Aqua 3 ARGB Black | ⭐⭐⭐⭐🌟 4.7 / 5 · 431 Reviews |
| Aqua 3 ARGB White | ⭐⭐⭐⭐🌟 4.7 / 5 · 150 Reviews |
| Aqua 5 ARGB | ⭐⭐⭐⭐⭐️ 4.9 / 5 · 24 Reviews |
| Aqua 7 ARGB | ⭐⭐⭐⭐🌟 4.6 / 5 · 448 Reviews |
| Aqua 9 ARGB | ⭐⭐⭐⭐🌟 4.5 / 5 · 113 Reviews |
| Cypress 3 Wood | ⭐⭐⭐⭐⭐️ 4.8 / 5 · 200 Reviews |
| Cypress 7 Wood | ⭐⭐⭐⭐⭐️ 4.8 / 5 · 222 Reviews |
| Mirage 4 Black | ⭐⭐⭐⭐🌟 4.7 / 5 · 83 Reviews |
| Mirage 4 White | ⭐⭐⭐⭐🌟 4.7 / 5 · 57 Reviews |
| Mirage 6 | ⭐⭐⭐⭐🌟 4.6 / 5 · 120 Reviews |
Here are some of the reviews from our satisfied customers that show how much we value their experience and support:
|
My case arrived with the front panel damaged, contacted customer service, and they sent a replacement in less than 2 weeks. Other than that, no complaints. yaruguma_sou / ⭐⭐⭐⭐⭐️ |
||||
|
Excellent quality and great customer support. You can not beat Okinos for the price. sk / ⭐⭐⭐⭐⭐️ |
||||
|
I decided to go with this case for my first PC build, and I was not disappointed. I thought the price of a solid considering it comes with six springs installed RGB case fans, along with the fan hub. Good airflow, plus the front and side glass panels, make it easy to view the internals. I wish there was a bit more room behind the metal side panel for easier cable management, but still doable by all means, highly recommend this case. I would also like to note that I had emailed Okinos customer service and their reply was timely. Matt / ⭐⭐⭐⭐⭐️ |
||||
|
I absolutely love this case. Its beautiful, elegant, and spacious. Great customer support as well. Alicia Mueller / ⭐⭐⭐⭐⭐️ |
||||
|
The product is decent. I had some issues with the case but it was well taken care by the customer support. Michael W. / ⭐⭐⭐⭐⭐️ |
||||
|
Honestly, I can NOT complain. I have one single issue with a fan, its just got a grinding noise like a bearing possibly? I MESSAGED OKINOS SUPPORT AND THEY REPLIED IN 2 HOURS. My support specialist David from okinos has been so wonderful & had me send a picture of the fan i had the concern about (ONLY TO MAKE SURE HE SENT THE CORRECT POSITIONED FAN!!!!!) not once did he question me!!!! He sent my support warranty over to the warehouse and is sending me a replacement fan. It may have had a tiny issue (all things have faults.) but their customer service gets 10 stars. It is beautiful, bright, and until this fan started acting funny, this thing is silent. Ashley Coleman. / ⭐⭐⭐⭐⭐️ |